


Until recently, when it came to ice cream, I was a champion of the cup. Less mess, and you can keep flavors separate, taking a bite of one flavor before switching to the next. But in recent years, I have become a bit of a cone crusader. They’re edible, add texture, produce no trash, and they’re fun! This summer, between making a cone castle ice cream cake (complete with 3 types of cones) and a European vacation sampling lots of glace and gelato, I’ve consumed many, many, many cones.
There seems to be a cone-aissance happening right now. The cones I encountered on my trip were not those of my childhood–a simple, edible vehicle for ice cream–but elevated with hints of vanilla, salt to balance, etc. My favorite came from Folderol: you could taste the butter.
All of these delicious cones inspired me to get home and make some of my own (with the added challenge of not having an iron). Wanting to create a roll-up cookie that kept that fun external texture of the waffle cone, only one cookie came to mind – the brandy snap. A brandy snap is basically some toffee sauce mixed with flour, briefly baked in the oven until golden and bubbling, formed into a cone or log, and stuffed with brandy whipped cream.
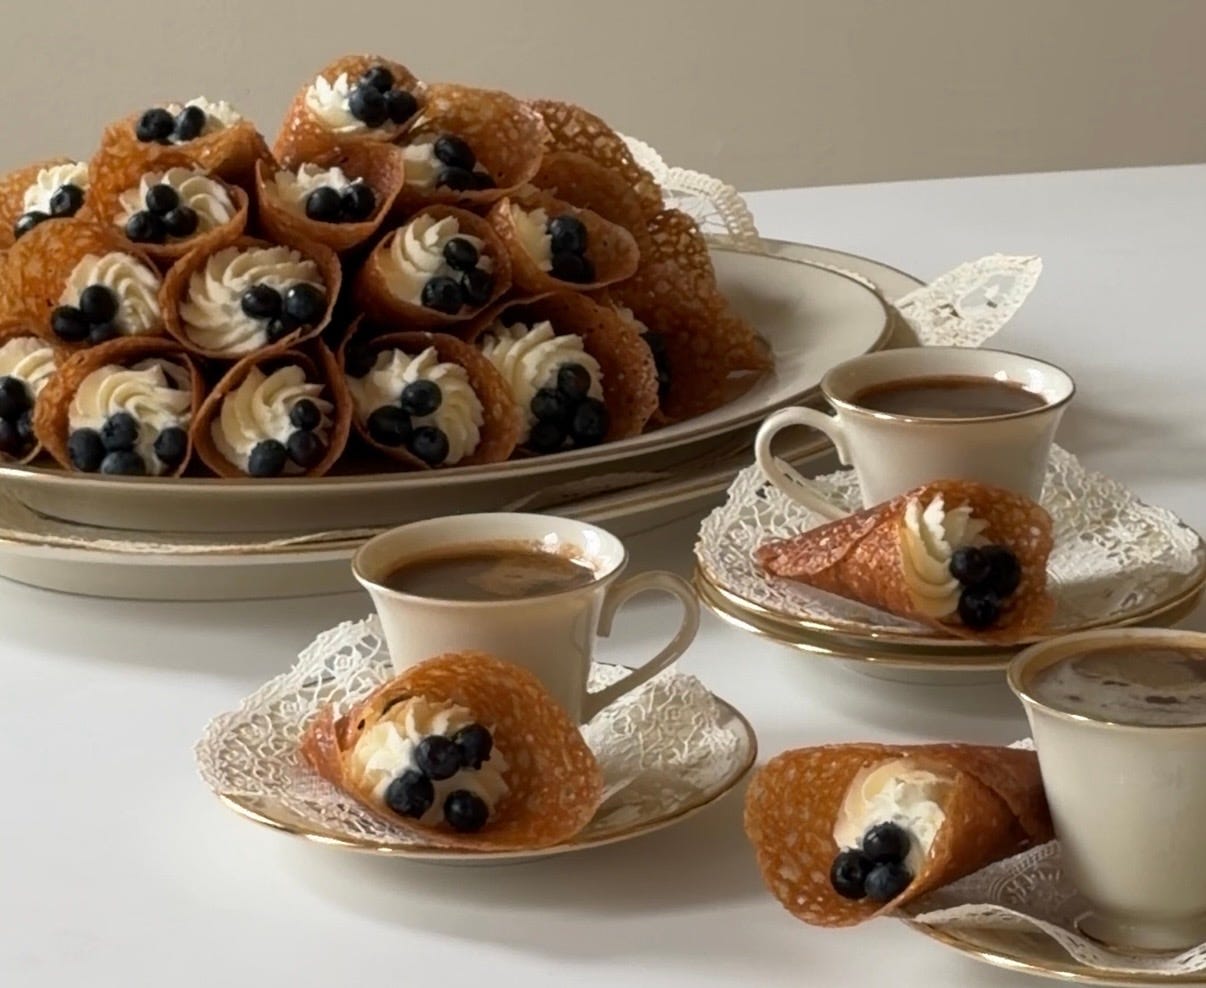
The final result is a shattering-crispy-caramel-y cone that gives way to fluffy brandy-tinged cream and–in this recipe–blueberries for little bursts of brightness (but you can pick any berry you like). These cookies are unlike any I’ve had before: both ethereal (chantilly cream) and decadent (buttery toffee), and visually elegant to boot.
Due to all the whipped cream, I kept my coffee simple: a double shot of espresso. Some shattering caramel and cold brandy chantilly cream with a hot and bitter espresso? Perfect.
More Coffee + Cookie recipes:


Some practical notes:
While the batter is super quick to prepare, the cookies require a little patience. The cooking and baking look like: 5 cookies into oven → out of oven → cool just enough → quickly shape cookies → let cool entirely → do this 3x)
You can make the cookies 1-2 days in advance, but leave them unfilled (only fill them just before serving to keep the snappy-creamy combo intact). Store them at room temperature, in an airtight container with the cones packed loosely and separated by parchment. Bonus points for adding some rice bundled in cheesecloth – this prevents the cones from getting soggy.
Once these cookies are filled, please serve them immediately (or within the hour)!
Makes about 12-15 cookies
Brandy Snap Cones:
50g butter
45g brown sugar (I used dark brown)
45g golden syrup/light corn syrup
30g all-purpose flour
1/4 tsp Diamond Crystal kosher salt
1/4 tsp ground ginger
Mascarpone Whipped Cream:
100g mascarpone cold
30g powdered sugar
Lemon/orange zest (to taste – I passed the zester over the lemon just a few times)
10g brandy/cognac (or vanilla extract)
250g heavy cream cold
Decoration:
1 cup of blueberries (or any small berry) to taste washed and dried
Tools:
Baking sheet unwarped!!!
Silicone baking mat
Cream horn molds or cardstock/flash cards + packing tape (or any strong tape) + tin foil
Thin spatula (I like a fish spatula)
2-tsp ice cream scoop (helpful, but not necessary at all – I used a 1-tbsp scoop)
Piping bag + closed-star piping tip (I used an Ateco 849 tip)
You can find ingredient information and tips for conversions on my conversion cheat-sheet page. If you have any further questions, please feel free to leave a comment!
Make Your Cone Molds!
Follow these directions if you don’t already own cream horn molds. You can also purchase some here.
Grab your cardstock/flash cards and cut them into 5 pieces measuring ~3.5 x 3”. Roll 1 piece corner to corner (short sides overlapping), with a narrow opening at the mouth. Tape to hold. Repeat with your remaining 4 pieces of cardstock.
Then carefully cover each piece of cardstock with tin foil, trying to keep it from getting too many ridges/creases. Set aside until ready to use.
Make the Brandy Snaps!
Preheat the oven to 350f and set a rack in the middle of your oven. Grab your silicone baking mat and place it on your baking sheet.
Take a small-medium pot and add in your butter, brown sugar, golden syrup/light corn syrup, salt, and ginger. Transfer to the stove and place over medium heat. Melt the butter and stir constantly with a whisk to combine the butter with the sugars. Remove from the heat once warm and once the butter and sugars are fully combined.
Add in your flour and whisk to fully combine. That’s it for the batter!
Grab your baking sheet lined with a silicone mat, and your 2-tsp ice cream scoop if you have one (otherwise just use a spoon and make an educated guess, or use a 1-tbsp measure and fill it 1/2 of the way full). Scoop 5 1½ - 2 tsp-sized dollops onto the mat, leaving at least 3” on all sides for the cookies to expand. If any of the batter trails off to the side, just push it back into a circle with your finger.
Transfer the cookies to the oven and set a timer for 8 minutes. These will likely take 9-11 minutes to bake, and you will need to go by sight vs. timing here (all ovens are different). When done, the cookies will have spread, will be bubbling throughout, and will be amber-colored.
While the cookies bake, grab your spatula, your cream horn cones (or tin-foil cones), and a cutting board (or just make sure your work surface is very clean).
Once the cookies are done, remove them from the oven and allow them to cool for 1-2 minutes, so that they can be shaped. They are cool enough to shape when you can easily fit your spatula underneath and lift them up without it wrinkling or drooping too much (some drooping is fine). Flip the cookie over onto your cutting board/prepared surface. Working very quickly, place your cone mold diagonally on the edge of the cookie furthest away from you. Pull the cookie up onto the mold and then roll the cookie tightly on the mold towards you. Repeat with the remaining 4 cookies. Move quickly here! If they cool off too much, place them back in the oven for 30-60 seconds to soften, and then you can try again.
Once this tray of cookies has been shaped, dollop on more batter, bake, and roll as outlined above.
While the next round of cookies is baking in the oven, take the prior round of cookies off the cone molds. Only remove the cookies once they have cooled (this will take ~1-2 minutes); otherwise, they will slump. Set these cooled cookies aside while you bake the rest.
If you would like to bake these cookies in advance (24-48 hours), you can do so; just be sure to store them properly. Leave them unfilled (you can only fill them just before serving to keep the snappy-creamy combo intact) and store them at room temperature, in an airtight container, with the cones packed loosely and separated by parchment. Bonus points for adding some grains of uncooked rice bundled in some cheesecloth.
Mascarpone Whipped Cream!
Best made right before piping.
Place the mascarpone, powdered sugar, lemon or orange zest, and cognac/brandy/vanilla extract in a large bowl. Use a hand mixer to incorporate the sugar into the mascarpone and soften the whole thing.
Pour in the heavy cream, turn the mixer on high, and whip until soft-medium peaks form; as the cream sits, it will thicken. Whipping the peaks too firm can make the whipped cream–with the addition of mascarpone–turn grainy.
Assemble!
Only move on to the assembly once you are ready to serve.
Fit your piping bag with your preferred piping tip and scoop in 1/2 of your prepared mascarpone cream. Stick the rest in the fridge.
Grab your cookies, blueberries, and a platter/plate/or cup for the filled cookies.
Squirt a little cream into the bottom of the cone and then drop in 3 blueberries. Squirt again and add another 3-4 blueberries. Then pipe a little swirl/rosette just up to the lower edge of the cone (you don’t want to pipe the cream too high, or it will be too much). Squidge a few berries on the top. Place the cookie on the platter, plate, or upright in the cup.
Repeat with the remaining cones. When you run out of cream, just refill the bag with the remaining mascarpone in the fridge. Finish the rest of your cones.
Best eaten fresh, with a double shot of espresso :)