

Coffee + Cookie: Hamburger Icebox Cookie
Almond-chocolate (and orange) greatness

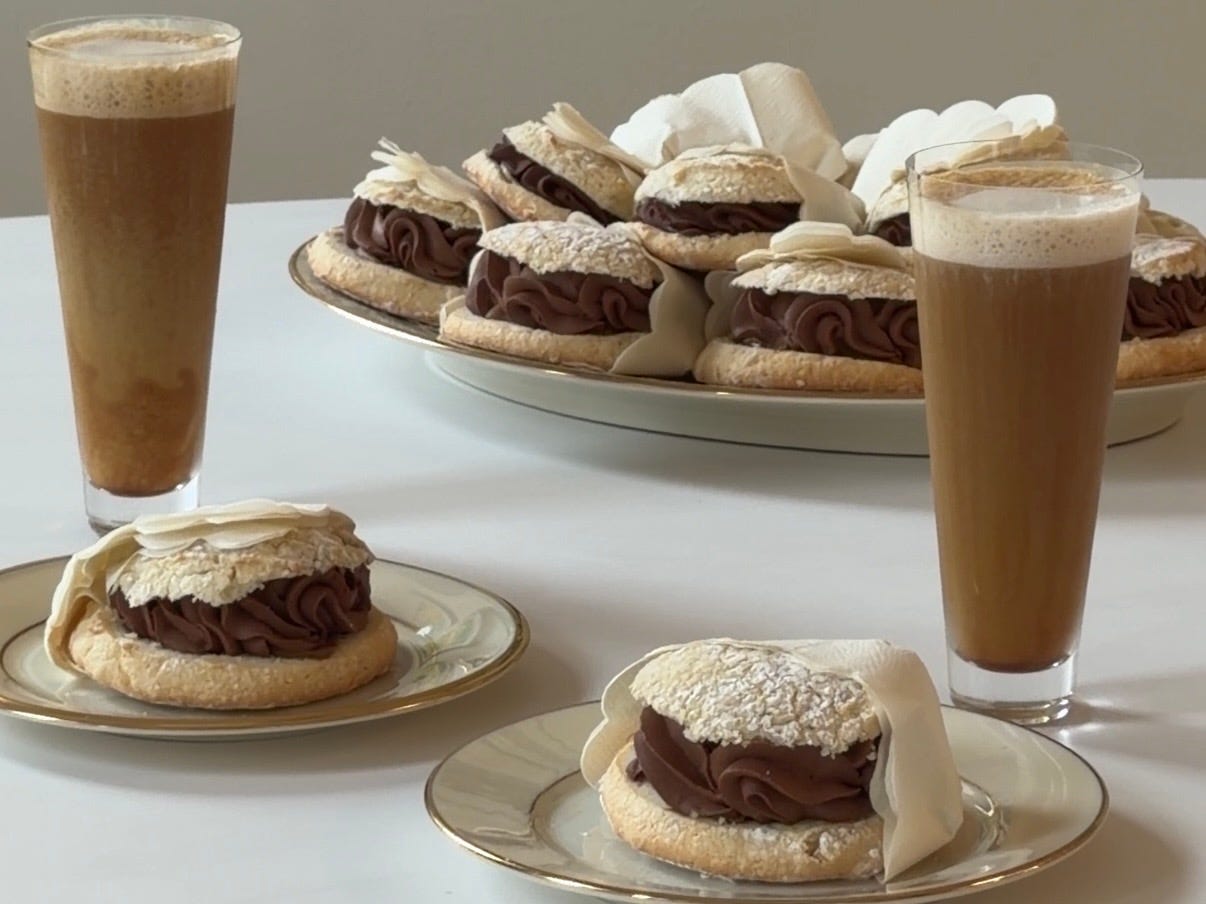
I don’t make the rules… If the July Bakeover recipe is a banana split ice cream sandwich that looks like a hot dog, then the July Coffee + Cookie recipe has to be an icebox cookie that looks like a hamburger. Don’t worry, though, the similarities between a hamburger and this cookie end at aesthetics. It’s an icebox cake made from soft amaretti cookies and whipped dark chocolate ganache. When chilled, it eats like a feather-light truffle.
More Coffee + Cookie recipes:


New Jersey in July is–quite simply–too hot for any cookie straight out of the oven. In fact, on some days it’s too hot for a cookie at room temperature, I want one cold. The cookie this month was inspired by icebox cake, a cake made from cookies (generally thin and crispy ones), layered with whipped cream, and then left to set up in the fridge. The cream softens the cookies, the cookies firm up the cream, and the final result is delicious. This recipe is just like an icebox cake in sandwich cookie form.
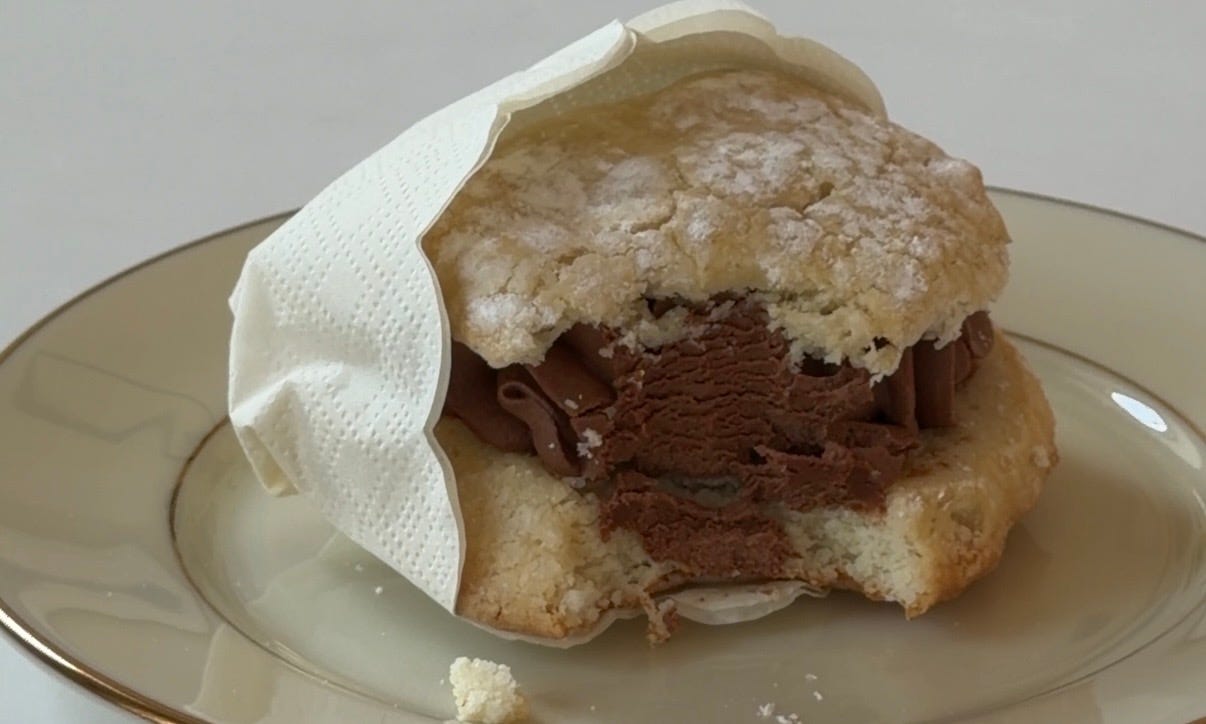
The almond cookies here are a bit softer than the crispy cookies we usually use for an icebox cake. This cookie recipe originates from an amaretti morbidi (soft amaretti cookies) recipe but has a few tweaks for added airiness (and reduced sweetness). That added airiness allows for the moisture from the cream to infuse throughout the whole cookie. The final cookie texture, once it’s rested with the cream, is so soft/airy/pillowy and has the faintest crisp shell at the outer edge.
The amaretti cookie is predominantly almondy in flavor, but is lovely when supported by just a bit of orange to round it out (I like a touch of orange blossom water, but orange zest would be splendid if you have one on hand). To complement the soft almond cookie, we have a whipped dark chocolate ganache – yum.
When the cookie is served cold, the whipped ganache is a bit firmer, and the cookie becomes like a luxuriously rich chocolate-almond truffle. When you eat them at room temperature (after storing them in the fridge), the ganache will soften, and all the flavors will become more pronounced. I suggest trying it both ways and seeing which you prefer more. Either way, it’s sublime with a coffee. Because of the heat, I went for iced espresso with Sicilian almond cream (to reference the cookie, of course), although I would imagine this would be delicious dunked into a warm coffee if you make this in cooler times. Whatever milk you do use, don’t be afraid to add too much; it softens the bitterness a bit, which is nice with the dark chocolate.
Makes 6 ‘hamburger’ cookies (you could also make them smaller, and make more, these are rich)
Amaretti Morbidi-Inspired Cookies:
100g almond flour (blanched if you don’t want any speckles, like mine)
25g cornstarch
25g all-purpose flour (I think you could probably replace with GF flour quite easily, but I have yet to test this)
1/4 tsp baking powder
1/4 tsp Diamond Crystal kosher salt
65g egg whites room temperature (from 2 large eggs +/- 5g)
1/2 tsp white vinegar
75g powdered sugar + more for dusting
25g liquid honey, corn syrup, or agave syrup, etc.
1/2-3/4 tsp almond extract (I did 1/2 as this felt balanced to me, but if you like a really pronounced almond flavor, use 3/4 tsp)
1/2-3/4 tsp orange blossom water or the zest from half an orange optional
Whipped Ganache:
100g 70% cocoa chocolate (you’ll want to use the good stuff for this!) broken or chopped into small pieces
200g heavy whipping cream (divided 75g and 125g)
20g corn syrup, light agave syrup, or substitute with sugar
Pinch of salt
Tools:
1/4-cup ice cream scoop (for scooping the cookies; you could also use spoons or a piping bag)
Piping bag + piping tip for the ganache (Atecco 844 is the one I use, but you can use any tip! OR you could use a 3-tbsp ice cream scoop for more of a ‘hamburger’ effect)
Bread knife
Sieve (for dusting powdered sugar)
Hand mixer or stand mixer
Blender or personal-sized blender totally optional, but if you have one, use it!
You can find ingredient information and tips for conversions on my conversion cheat-sheet page. If you have any further questions, please feel free to leave a comment!
Cookies!
Grab a rimmed baking sheet and line it with a piece of parchment paper. Make some space in your freezer for the sheet + an extra 1” of height at the top, and let the baking sheet sit in the freezer while you prepare the cookie batter.
If you have a blender, place your almond flour, cornstarch, all-purpose flour, baking powder, and salt in the blender bowl. Give the bowl a good shake, so that the flour and cornstarch are really coating the almonds, then give it a quick blend to grind up the almond clusters a bit finer, and to distribute everything. Don’t blend for too long, as it will begin to clump and make almond butter (how quickly this happens will depend on the almond flour and how fresh it is). As soon as you notice it beginning to clump, stop the motor. Set aside.
If you don’t have a blender, whisk the almond flour, cornstarch, all-purpose flour, baking powder, and salt in a medium-sized bowl until everything is fully combined and well distributed. Set aside.
In a medium-large bowl, or the bowl of your stand mixer, add in your 2 egg whites (make sure to get no yolks in). It should weigh ~65g (if you’re under 60g, add more egg white, and if you’re over 70g, remove some). Add your white vinegar. In a separate medium-sized bowl, measure your powdered sugar.
Grab your hand mixer, or the whisk attachment for your stand mixer, and mix the egg whites at the lowest setting for 30 seconds. Then go up a level and mix for another 30 seconds. Then go up another level and mix for another 30 seconds. Slowly increasing the speed like this leads to a more stable egg white. Continue doing this until you get soft peaks (you should be at or near the highest speed at this point), then add in 1/3rd of your powdered sugar, fully incorporate it in, and repeat until all your powdered sugar has been added. The egg whites are properly whipped when they are shiny, have tiny and uniform air bubbles, and there is a sudden shift in texture. It should seem thicker/stiffer, and when you lift the beaters out, it should hold a tall peak (curving just at the tip) and not slump over immediately. Once you’ve noticed all of this, your egg whites are done. Do not continue, or you risk over-whipping them. When over-whipped, they will lose their shine, becoming cloudy and cottage cheese-like.
Grab that medium-sized bowl we used to weigh the powdered sugar and place 75g of the whipped egg whites in there (this is a little more than half). Add in your honey/corn syrup/agave, almond extract, and orange blossom water/orange zest (if using). Fold to combine and loosen up the whipped egg whites. Then add in your dry ingredients. Use a soft spatula to fold them in until thoroughly combined. Do so gently; we want to preserve some lightness while ensuring there aren’t any large clumps remaining. You might be worried about deflating the air bubbles too much–do know they will deflate quite a bit– but that’s why we saved half of the meringue!
Once the dry ingredients have been incorporated into half the meringue, gently fold the batter in with the remaining meringue to lighten it – be sure to be gentle here! You want everything to be mostly incorporated – it’s okay if a few streaks of meringue remain. I would rather it be under-mixed than over-mixed at this stage. If you fold too much or too vigorously, the batter will loosen up, making your burger bun flatter and wider (still delicious, just less bun-like, and a little more difficult to slice).
Once the batter is ready, grab your 1/4-cup ice cream scoop and your tray from the freezer. Scoop the batter and level it off on the side of the bowl. Scoop 6 cookies onto the tray (if you over-folded your batter, one cookie might be a little small, but if you folded it right, your final cookie may be a bit big; that’s okay).
Transfer the cookies to the freezer for 20 minutes to firm up. In the meantime, preheat your oven to 300f. While the oven warms, and the cookie batter cools, wash your dishes, and grab your sifter/sieve and some powdered sugar.
Once your timer goes off, take the cookies out of the freezer, dust a little bit of powdered sugar on top of them, and transfer them to the oven. Set a timer for 15 minutes. Mine took ~17 minutes: once done, the cookies will be puffed, golden with light brown bottoms, and soft but not raw when gently poked. Remove from the oven and let cool on the baking sheet to room temperature (20-30 minutes). Then transfer the tray with cookies back to the freezer for ease of slicing (30 minutes).
As soon as the cookies go back in the freezer, begin your ganache.
Whipped Ganache!
Take 75g of your heavy cream, and your corn syrup/light agave syrup/sugar, and heat over the stove or in the microwave until just beginning to simmer. Remove from the heat and add in your chocolate and salt. Let the mixture sit for 1 minute and then stir to combine the chocolate into the cream. Once the chocolate is fully mixed in, add the rest of your (chilled) heavy cream and mix to combine thoroughly. Transfer to the fridge to help it chill quickly.
Set a timer for 25 minutes – this is for the cookies in the freezer and your ganache. Once the timer goes off, give the ganache a stir, and check on its temperature, we’re looking for it to be somewhere between 60-67f. If it’s not there yet, put it back in the fridge. Check every 10 minutes until it is. In the meantime, you can move on to the prep for assembly (see below) and return here once the ganache is ready.
Once the ganache is between 60-67f, grab your hand mixer and whip until the cream holds a stiff peak. There is a risk of over-whipping and going grainy here, so whip until stiff peaks just hold – see the video above (it likely will require less whipping than you think!). Use the whipped ganache immediately.
Prep for assembly!
Grab your cookies from the freezer, and peel off the parchment paper. Use a bread knife to slice each cookie in half (like a burger bun). I find it looks best when the bottom is a bit thinner than the top. Do this gently and try not to squeeze the cookie too much (also, of course, be careful not to cut yourself).
Keep the cookies on the tray with the tops next to them.
Prepare your piping bag by fitting it with your piping tip of choice.
Decorate!
Transfer the whipped ganache to your piping bag, and pipe a shell border close to the edge of the cut side of each bottom cookie half. Then fill the center with more of the whipped ganache. If you feel like you didn’t pipe close enough to the edge, you can squish a little extra into the center, and it will push the shell border out to the edges. See video above for piping reference!
Repeat with all 6 cookies. You may have a little ganache left over; it depends on how much you pipe into your cookies. You can either transfer the cookies to a smaller container (a 9x13, 2 storage containers, or something like that) and cover with a lid or cling film to let the cookies set up. Or–alternatively–you can just wrap your baking sheet with cling film.
Transfer the cookies to the fridge for a minimum of 4 hours to set up, preferably overnight. Once the cookies have been set up, they can be transferred to a smaller container and stacked inside it (be careful not to squish them, though).
To serve, I wrapped a cookie in a napkin to keep my fingers clean and paired it with an iced espresso with a whole bunch of Sicilian almond cream (some of it whipped). It was perfect. I adored these cookies both chilled and at room temperature. Chilled is more truffle-like and rich, while room temperature leads to fuller flavor expression and a softer texture.
Store cookies in a container in the fridge for up to a 5-7 days. Enjoy!