Hazelnut Tiramisu Ice Cream Sandwiches
A no-churn mascarpone hazelnut ice cream, a praliné swirl, and espresso-soaked ladyfingers that stay soft even when frozen
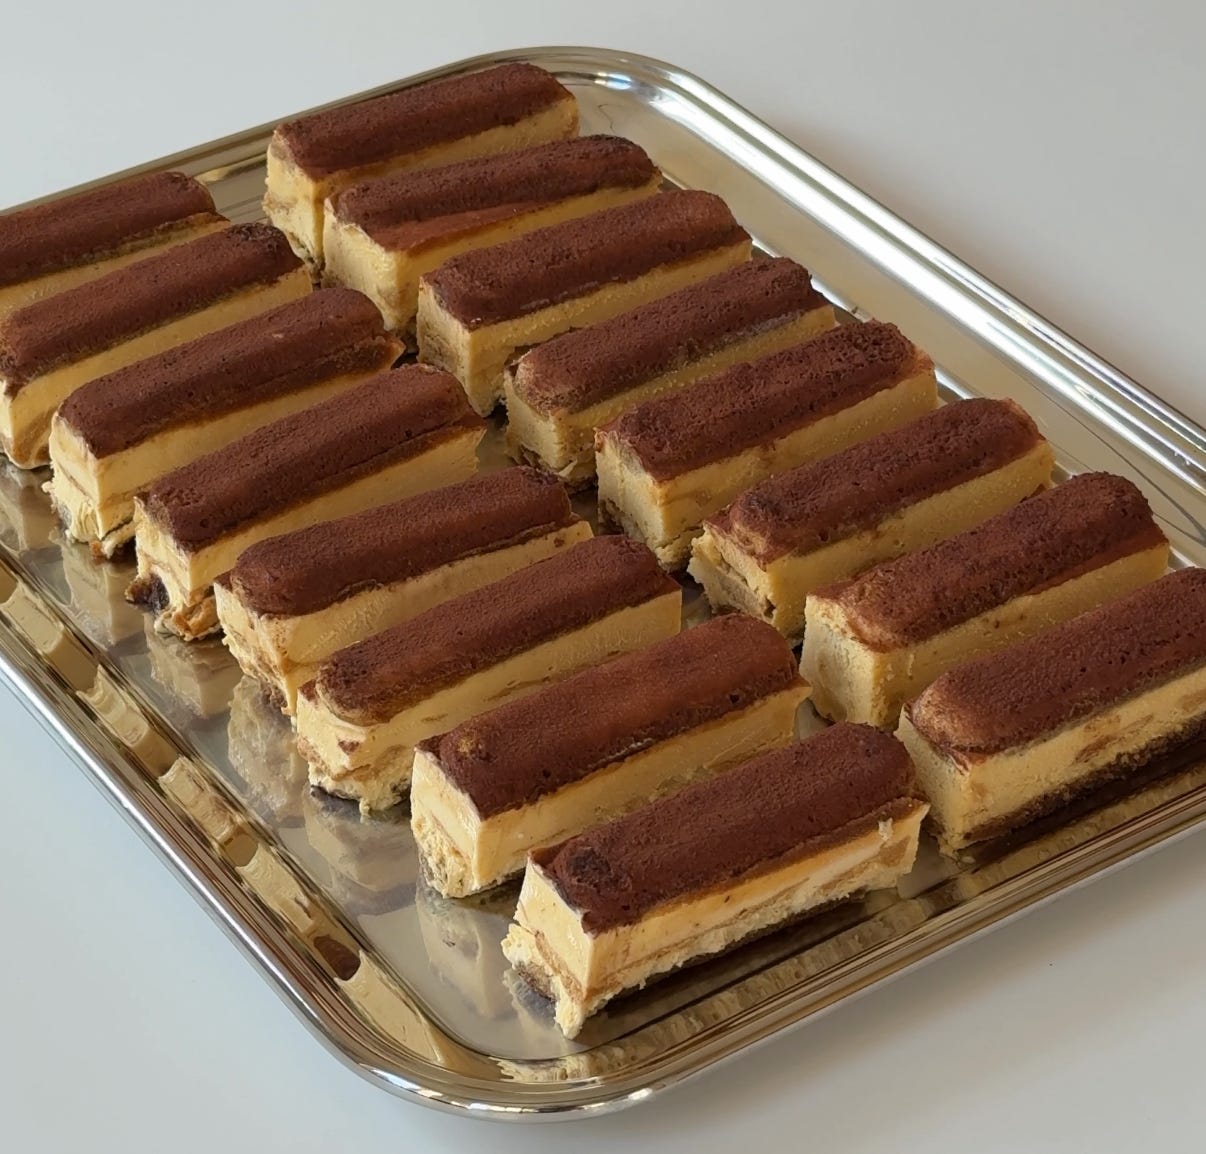
Last year, I published a recipe for no-churn tiramisu ice cream sandwiches ahead of the paywall because I loved it so much. You all seemed to love it too :’) Not only were they delicious, but they were also so easy to make. So today, I am reminding you that this recipe exists, and I'm bringing you a new variation. This time, hazelnut-tiramisu ice cream sandwiches. YUM.
…and speaking of ice cream, please see the poll below, responding to it will help me with next month's recipe :)!
The recipe starts by making a mini batch of hazelnut praliné (hazelnuts and caramel blended together into a delicious spread). Half of it gets mixed into the ice cream base and rippling (see ripple in the video above), and the other half gets mixed into the mascarpone ice cream base, adding hazelnut flavor and caramel-y notes.
These sandwiches are so tasty. Coffee, hazelnut, chocolate, and caramel all come together, creating this dreamy dessert of cold, creaminess, and a little crunch. When working on a partnership with Sézane, I stumbled upon this blouse. Its muted ivory, almost butter color inspired me to put a French twist on my old recipe. I’m so happy it did because now I get to share this with you today!
Please do enjoy the recipe (sans paywall) below, and don’t miss the important PSs.
PS. These need to set up overnight, so prepare to make them at least 1 day in advance.
PPS. Please do note that you need a small high-powered blender to make the hazelnut praliné component. If you don’t have one, you can double the recipe and blend it in a regular-sized high-powered blender or high-powered food processor. With that being said you can always just use store bought praliné for a quicker version or you can sub it in for any nut paste (not the same as nut butter!) and I will just say that I tried this with store bought pistachio paste and it is delicious
PPPS. Last year’s recipe made a huge batch. I’ve reduced the quantities this year, but if you do want to make a large batch for a 9x13” pan, multiply every measurement given in the instructions by 1.5x (e.g. 100g of hazelnuts becomes 150g).
PPPPS. Last year's recipe includes a recipe for gluten-free lady finger sponge. If you wish to make that you can find the recipe here :)
Ingredients
Please note that you can find more ingredient information and tips for conversions in my conversion document. If you have any questions, please refer to the document or feel free to leave a comment!
Hazelnut praliné (you can also purchase your own to save the trouble!):
100g sugar
100g hazelnuts raw and blanched (aka no skin – you will need to remove the skin if there is some, as it is bitter)
5-30g hazelnut oil (or sunflower oil, or a very neutral oil)
A pinch of diamond crystal kosher salt
Espresso soak:
150g espresso hot
90g white sugar
1/8tsp heaping diamond crystal kosher salt
30g Frangelico aka hazelnut liqueur (or another nut-flavored liqueur or orange liqueur might also be delicious!) please do not skip on the liqueur – this helps keep the ladyfingers from getting too frozen
Hazelnut mascarpone no-churn ice cream:
4-5 large eggs
150g white sugar
3/4 tsp diamond crystal kosher salt
300g mascarpone cold straight from the fridge
150g heavy cream cold straight from the fridge
10-15g vanilla extract
180g of the praliné (recipe above) (divided into 80g and 100g)
Assembly and finish:
275g ladyfinger cookies
Cocoa powder (for dusting)
Tools:
9x9” baking tray
Mini high powdered blender
Hand mixer or stand mixer
Digital thermometer (not necessary but highly recommended)
Sifter/sieve or pastry brush
Hazelnut praliné!
Heat your oven to 350f and line a baking sheet with parchment paper. Place your hazelnuts on the baking sheet, and transfer them to the oven to toast. Set a timer for 10 minutes. They will take 10-15 minutes to cook. You will know they are done once fragrant, toasty, and just beginning to look a bit shiny (I would prefer for you to under-toast than over-toast though!). If your hazelnuts do have a bit of skin on them, you can rub the toasted nuts with a towel to remove the excess.
Do note: This recipe is for a dry caramel. I find a dry caramel far easier to make than a wet one (dry caramel is when you heat sugar in a pan, and wet caramel has added water). There is also no need for candy thermometers, no standing over the stove forever (and then walking away for a second just for it to burn…), and no risk of crystallization. With that being said, the sugar can clump as you make the caramel, so be sure to work over medium-low heat and give those clumps time to break up.
Once the hazelnuts are out of the oven, set them aside while you prepare the caramel. In a separate medium-sized pot, place all of your sugar. Place the pan over medium heat and–using a big wooden spoon or something heat-safe with a flat bottom–move the sugar around in the bottom of the pot. It will begin to melt and clump together at first. Continue stirring and turn the heat down to medium-low to give those clumps time to dissolve into molten sugar before it starts caramelizing. You may want to try breaking the clumps up with the spoon to help speed up the process. You may also notice the spoon holding onto some clumps of sugar, just grab a knife to break it off. Stir constantly until all the sugar has melted and is amber-colored and caramelized (aim for a lighter color for a less robust praline and a darker one for a more intensity – personally prefer the lighter side).
Immediately remove the caramel from the heat and pour it over your toasted hazelnuts on the parchment paper. I like to drizzle the molten sugar to keep from getting a giant piece of caramel that is hard for the blender to process. Let the sugar cool on the hazelnuts for 15 minutes.
In the meantime, clean the pot (fill it to the top with water and place it on the stove, once it’s boiling, all the caramel should dissolve in the water and you can clean the pot as you normally would). You can also use this time to make the espresso soak below.
Once the hazelnuts and caramel have cooled to the point where the caramel is solid and hard. Grab a rolling pin, or something else stable and sturdy, and crack the nuts and the caramel into smaller bits (this will make it easier on your blender).
Then transfer the broken caramel and nuts to your high-powered blender (if you are using a mini one like me, you may need to do this in 2 batches). Blend. At first, it will turn into a powder, then into a paste. Now is when you add the hazelnut oil, start with just a bit and add more as needed - the amount will depend on your nuts. Once done, blend in the salt and set the praliné aside.
Espresso soak!
Place your hot espresso, sugar, and salt in a medium bowl and stir until all the sugar is dissolved. Then stir in your liqueur and set aside.
Mascarpone no-churn ice cream!
Grab your 9x9” tray and line it with parchment paper. In order to get it to fit snugly, cut ~2” slits at the width of the pan on the long sides of the piece of the parchment. Press the parchment down into the pan, fitting it to the bottom and letting each side curve to line the perimeter of the pan. Watch the video below for a visual.
Take your largest mixing bowl, or your stand mixer bowl, and find a pot the bowl will nicely fit over for a double boiler. Fill the pot with about 3 inches of water and set it over high heat.
In the meantime, place the bowl on a kitchen scale and begin cracking in your eggs. We are looking to get 215g of eggs. If the last egg brings the weight over 215g, remove some egg white until you hit 215g exactly. Add your white sugar and salt and whisk to combine.
At this point, the water in the pot should be hot. Place the bowl over the hot water. Whisk the eggs and sugar mixture until it reaches 165f/78c. This will take about 6 minutes (if you do not have a digital thermometer, whisk until the mixture is thin and hot to the touch).
Remove the bowl from the heat and use your hand mixer or stand mixer fit with a whisk attachment to whip until the mixture has quadrupled in size. It should be very fluffy and when the beaters are lifted out of the bowl, the whipped eggs should fall slowly/in a large clump. Using a hand mixer will take about 9 minutes (it will be a bit less in a stand mixer).
In your second largest mixing bowl, measure in your mascarpone, heavy whipping cream, and vanilla extract. Whip until the mixture is stiff and thick and your beaters leave a ribbon. Then add in your 80g of praline and whip again until it’s combined. Pour about a third of the whipped eggs into the whipped mascarpone. With your hand mixer on low, mix the three until there are no lumps. Add another third of the egg mixture and mix on low until there are no more lumps remaining. Then pour in the last third of your eggs and briefly mix on low to remove any pockets of mascarpone cream. Set the ice cream base aside.
Assembly!
Grab your ladyfingers and–working one at a time–quickly dunk both sides of the ladyfinger into the espresso soak (count to about 1 ‘Mississippis’). You don’t want the bottom layers too wet, as the cream will also soften this side a bit. Place each ladyfinger in the prepared baking tray, creating two rows along the length of the tray. Pour half of your mascarpone ice cream on top. Smooth it out/level it with a soft spatula or offset spatula, making sure to nudge the ice cream into the corners of the pan. Then drizzle your remaining praliné and swoosh it in for a more pleasant eating experience. Spoon your remaining mascarpone ice cream on top, and again level the top
. For the top layer of ladyfingers, soak your ladyfingers again, this time for a little longer (about 2 ‘Mississippis’) and place them in an even layer on top of the ice cream.
Transfer the baking tray to the freezer and freeze for 10 hours minimum, preferably overnight.
Finish!
PS. If you want to serve the dessert as an ice cream cake, just flip the cake out of the tray onto a platter, dust the top with cocoa powder, and serve and slice table side for guests.
Grab a large, sharp knife, a tall glass of warm water, and a baking sheet lined with parchment. Remove the frozen tiramisu cake from the freezer. Very, very lightly dust the top with cocoa powder (if you do a heavy dusting, it will fall off when you eat it and get your shirt dirty). If you are really nervous about cocoa powder getting on your clothes, you can also brush it on with a pastry brush, you will have less chocolate flavor but you won’t get any mess. Place the baking sheet lined with parchment on top of the baking tray and flip to remove the tiramisu cake from the tin. Remove the parchment from the ice cream and dust it lightly with cocoa powder again.
Dip your knife in warm water and cut the cake into sandwiches. I like to make the sandwiches 1 ladyfinger cookie wide (last year i suggested 1 or 2 wide, but because of the praliné swirl these are sweeter and so i would suggest reducing to just 1 cookie wide) - you should get 14 sandwiches.
Either serve immediately or transfer the sheet tray with the ice cream sandwiches back to the freezer to firm up. After ~30 minutes, transfer them to a storage container for storing, or place them in individual wax paper bags/wrap each in parchment (this will make the mess of cocoa powder less likely). Enjoy!
looks incredible, will attempt in a few weeks!
Yummy